How to Repair Pitted Concrete Garage Floor Updated
How to Repair Pitted Concrete Garage Floor
Garage Floor Resurfacing: Fix a Pitted Garage Floor
Special concrete resurfacers volition make a concrete floor wait similar new
Every editorial product is independently selected, though we may be compensated or receive an affiliate commission if you buy something through our links. Ratings and prices are accurate and items are in stock as of time of publication.
![]() Fourth dimension
Fourth dimension
Multiple Days
![]() Complexity
Complexity
Beginner
![]() Cost
Cost
$101–250
Introduction
Restore a pitted concrete garage flooring with an easy-to-apply resurfacing production. It'll make the floor look fresh and new again at a modest price.
Tools Required
Materials Required
- Physical cleaner
- Physical fissure sealer
- Resurfacer
Project step-by-step (x)
Pace ane
Results to expect
If your slab is suffering from low self-esteem because of pits, craters or cracks, yous can cover upward those scars. Concrete "resurfacer" is a cement-based coating that forms a shine, new surface right over the quondam physical. The cost of resurfacer for a two-car garage is typically less than $200. Yous'll also need to purchase or rent some special tools, so expect your total cost to be virtually $300 for this how to resurface concrete project.
Cleaning and resurfacing the flooring ordinarily takes 1 day (on the other manus, clearing out your garage then you can work may accept weeks!). Spreading the resurfacer smoothly is the trickiest part of the project, so information technology helps to have some experience with concrete or drywall finishing. Cool weather, with temps in the 60s, also helps. Warmer conditions makes resurfacer harden faster, reducing the fourth dimension you have to finish the surface.
As a offset-timer, y'all might achieve a perfectly smooth, flat finish. Or you might end up with a few rough spots and pocket-sized ridges. Only fifty-fifty if your work is far from flawless, you'll still make a bad floor look much meliorate. And call back this: If you lot make some major mistakes, you can add a 2d glaze—this time with the benefit of experience.
Step two
Buy the materials
Resurfacer
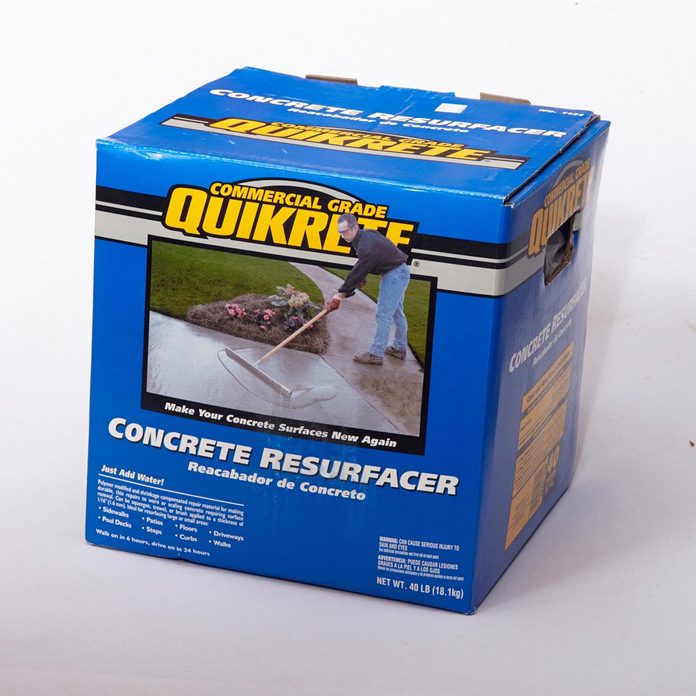
We used Quikrete Concrete Resurfacer (about $20 for 40 lbs.). Like products, such equally Sakrete Flo-Coat, are available. Purchase plenty to resurface the whole flooring. To estimate the corporeality you demand, check the label and then buy two or three actress containers. Better to render some than to run out before the chore'south washed.
Plastic sheeting
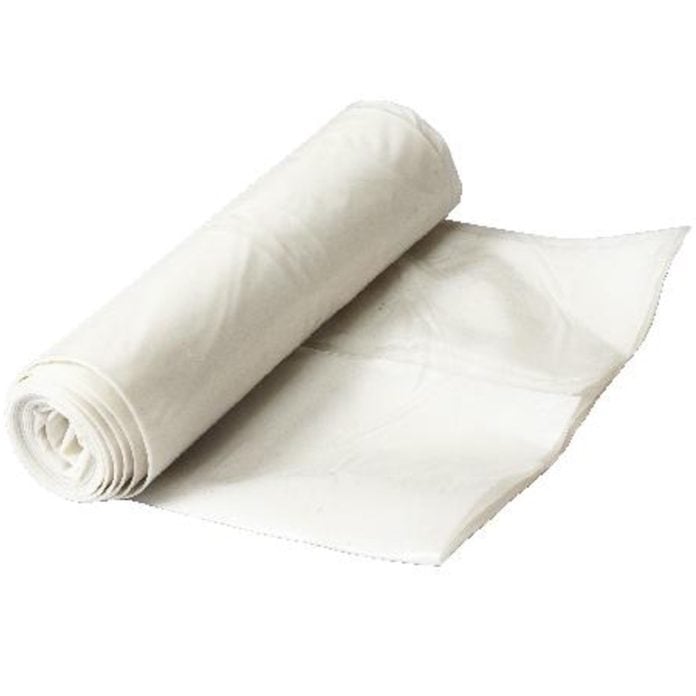
Protect walls with a band at least 3 ft. high. Nosotros used vi-mil plastic, just lighter stuff volition work too.
Castor and button broom
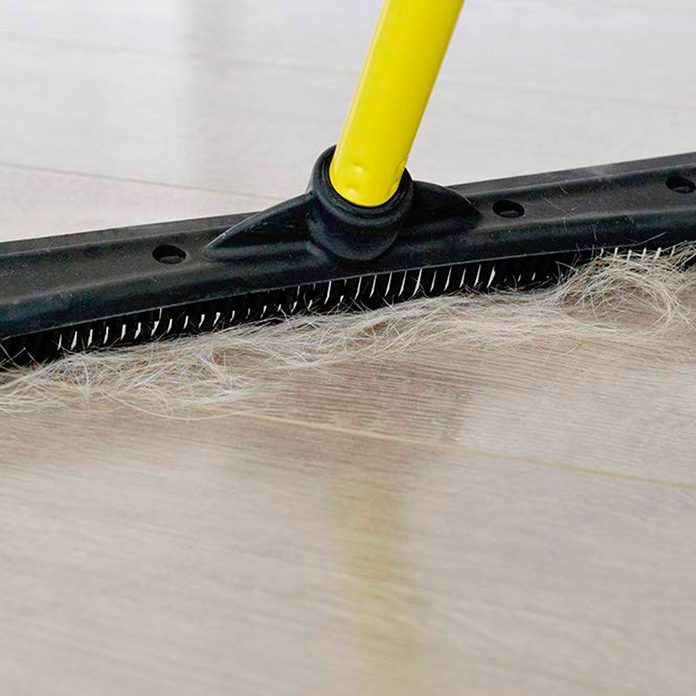
A potent castor designed for stripping decks and mounted on a handle (shown) will go along you lot off your knees ($10). So volition a push broom; get a push broom with the stiffest bristles you can discover.
Squeegee
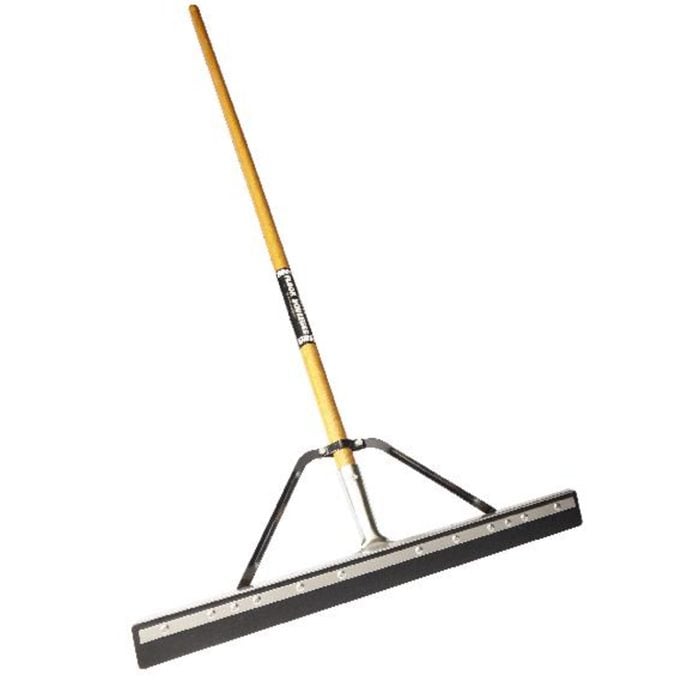
Get a beefy version designed for floors, not a lightweight window-cleaning tool. A quality squeegee will requite yous better results and is worth the price ($thirty to $45).
Mixing equipment

A powerful 1/two-in. drill and a mixing attachment ($12) are the only way to go. Mixing by hand is too slow.
Protective gear
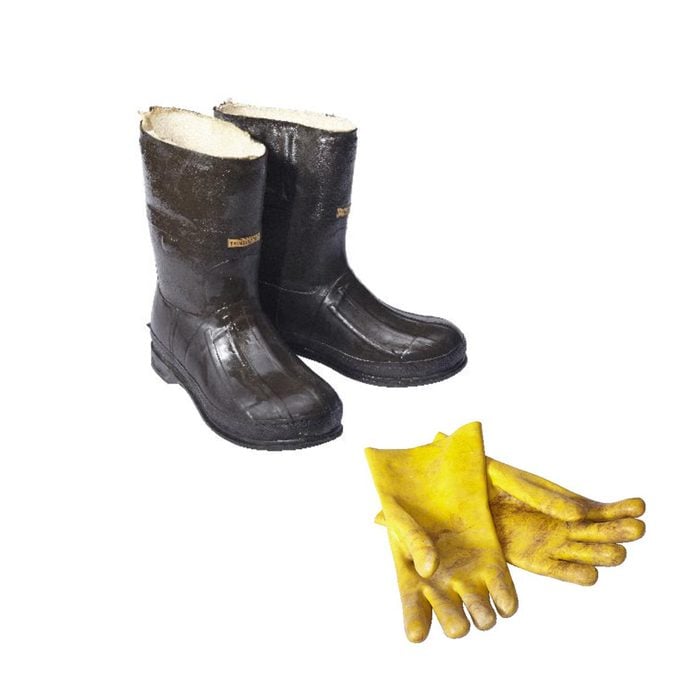
Rubber boots and gloves protect your pare against the degreaser and resurfacer (which tin can burn peel). You'll also need middle and hearing protection. You'll demand a pressure washer, concrete cleaner (such as Quikrete Physical & Stucco Wash No. 8601-15; at home centers), a brush, push broom and a floor duster. Buy plenty concrete resurfacer material (such as Quikrete Concrete Resurfacer; twoscore-lb. bags) to coat the entire flooring. Refer to the coverage specs on the bag to determine how many bags you need.
Everything yous'll need for this project is available at home centers. Aside from basic tools similar a hammer and chisel, buckets and a steel trowel, you'll need:
-
- Resurfacer
- Plastic sheeting
- Concrete cleaner
- Stiff, long-handle castor or push broom
- Pressure washer
- Squeegee
- Mixing equipment
- Protective gear
![]()
Step 3
Clean the slab and fill up deep holes and cracks
Start with a make clean floor

Scrub with a concrete degreaser and a potent brush, then follow up with a pressure level washer. Rinse twice to remove all rest.
Step 5
Remove the loose stuff
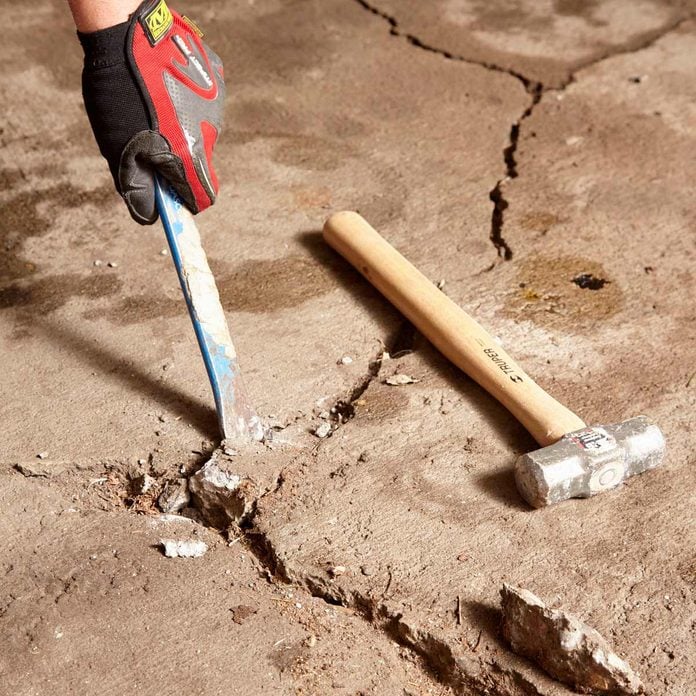
Chisel abroad whatever loose fragments along cracks or craters; there'south no need to bust away physical that's firmly attached.
Step half dozen
Concrete Floor Patch: Make full cracks, craters, divots and pits
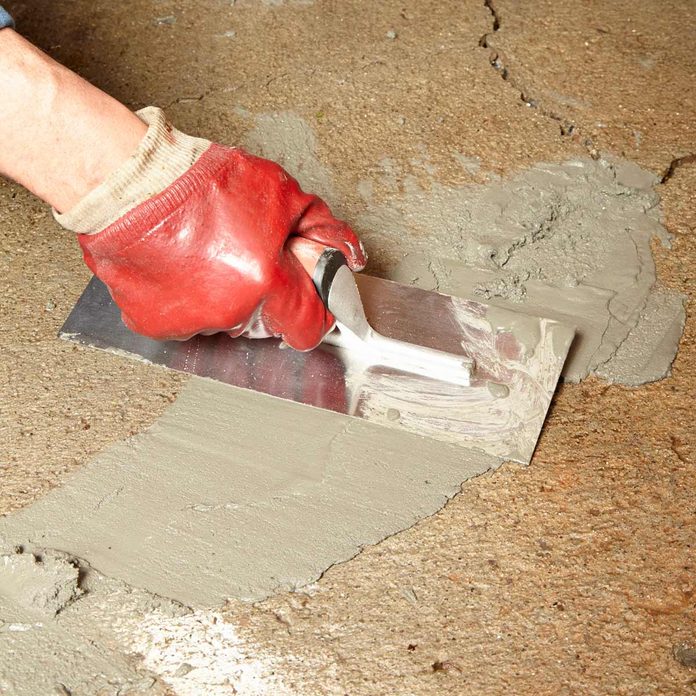
Mix up a stiff batch of resurfacer, using but enough h2o for a workable consistency. Scrape off the excess and so repairs are flush with the surrounding floor.
Step 7
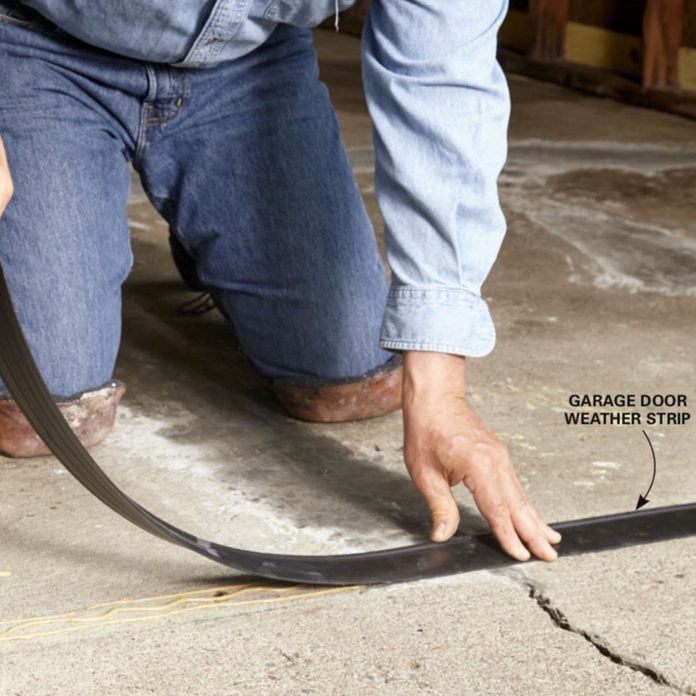
Create a dam
Glue weather strip to the floor exactly where the garage door rests. This will cease resurfacer from flowing onto the driveway. The cleaner the concrete, the improve the resurfacer will stick. Start with a thorough sweeping. If you lot accept oil spots to make clean, scrub them with a deck brush and concrete cleaner. Once y'all've removed the stains, apply cleaner to the whole slab with the castor. Then fire up the pressure washer (Photo 1). Start in the back of the garage and work your style to the front, forcing the excess h2o out the overhead doorway.
Important: If you discover that the cleaner doesn't soak into the physical but just beads up into aerosol on the surface, yous have a sealer over the physical that y'all'll need to remove. In that example, apply a stripper get-go to remove the sealer, and then make clean.
When the slab is clean, detect and mark the deep (ane/4 in. or deeper) pits and divots (Photo 2). Wait for any pieces of concrete that the sprayer may have loosened. Bit these away (Photo iii) and collect the debris as yous go, sweeping it into a dustpan with an old paintbrush. Now'south the fourth dimension to fill these cracks, divots and pits. Mix some resurfacer to a mashed murphy-similar consistency and push the mix into the cracks. Smooth it with a cement trowel flush with the surrounding surface (Photo 4).
If you lot have expansion joints cutting into the existing slab, push a atmospheric condition strip into the joint. This will maintain the articulation and give you a user-friendly time to stop and take a break. Utilise and smooth no more than than 150 sq. ft. of resurfacer at a time for the best results. Y'all can glue a length of weather strip to the slab to ascertain a stopping point if you don't have a control joint and and so go on from that edge once you've smoothed the first section.
For a nice-looking finished edge under the overhead door, we applied a heavy-duty vinyl atmospheric condition strip (Photo 5) that nosotros picked up at a local dwelling house center. Just exist sure to dry the slab along the location with a hairdryer so your adhesive will work properly.
Step viii
Mix and spread the resurfacer
Mix like mad
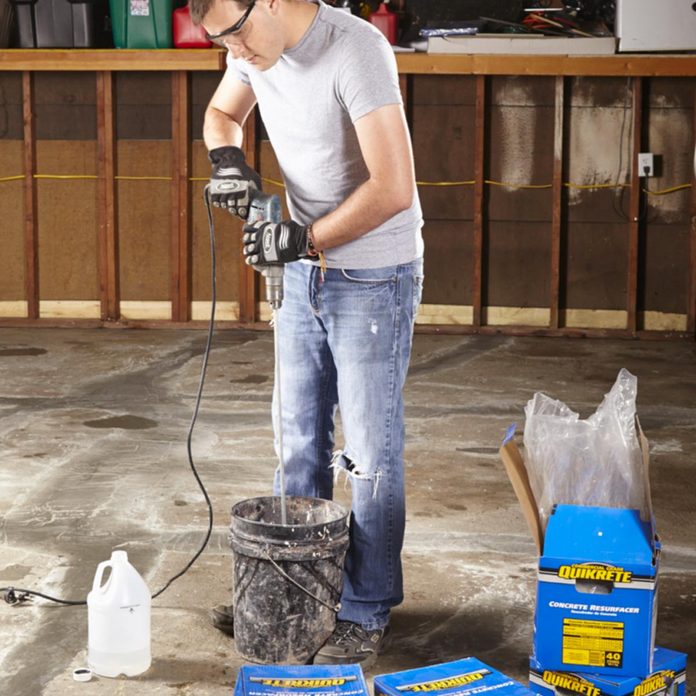
Recruit a helper to mix the resurfacer while you spread it. The material begins to stiffen apace, so the faster you get it all mixed and applied, the better your results.
Step 9
Spread it smooth, then permit it fix
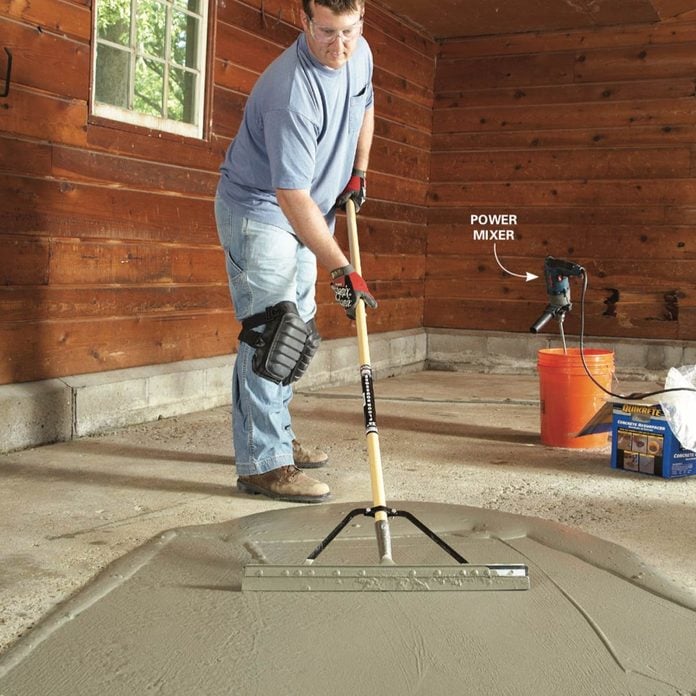
Spread from the middle of the pool. Push the squeegee forward under moderate pressure to work the resurfacer into the physical and force it into pores and pits. Then drag it back to eliminate edge ridges and to smooth the coating. Continue spreading until you lot go even coverage. Aim for a thickness of i/8 in. When you've covered the whole flooring, let it cure for 24 hours before you drive on information technology. This is the fourth dimension to recruit a helper. Yous'll need ane person to mix and another to spread resurfacer. Have two minutes to read the directions before mixing. The key to a polish, lump-costless mix is to permit the resurfacer 'slake,' that is, sit in the saucepan for a few minutes afterwards the initial mixing. Then mix a chip more (Photo 6). It's also good to take a slat of woods on hand to scrape the sides of the bucket equally you mix.
Saturate the concrete with water so utilise a broom to push out any puddles from the pitted areas or low spots. The concrete should be damp when you employ the resurfacer, but not wet to the bear upon. Pour the mix into a pool on the slab and immediately spread information technology (Photo 7). Work quickly and carefully, blending each stroke into the previous one until you get a prissy, uniform expect. Smooth the resurfacer forth the side walls by pulling the duster toward y'all. As you attain the border of the door atmospheric condition strip, use your steel trowel to gently blend the resurfacer confronting the weather strip. Yous can remove the backlog with the trowel and drib it into a saucepan.
To apply a nonslip texture, lightly drag a make clean push button broom in one direction across the still-moisture material (allow no more than five minutes of setting time before applying the broom finish).
With the slab finished, let the mix set. In hot, dry weather, it'due south a skillful idea to mist the hardened surface; keeping it damp longer volition permit the resurfacer to fully harden. Later on several hours, the finish will back up foot traffic. If the pits still prove, let the material ready upwardly and apply a 2nd coat later on in the day. But you lot can stop with one coat if it provides proficient coverage.
Depending on the weather, wait at to the lowest degree 24 hours earlier driving on your newly finished slab. Follow the manufacturer's directions for additional hot-weather misting procedures or actress drying time for absurd weather. Later a few days of curing, you can apply a sealer if you lot'd like to protect the slab from oil and other stains.
Step 10
Erase your mistakes

If you end upwards with ridges, shallow craters or squeegee marks, you don't accept to live with them forever. Go to a rental shop and rent a physical grinder for about $125 a day. It looks like a floor polisher, but information technology grinds downward the surface, removing nigh ane/16 in. with each slow pass. It's a dusty task that might take all day, but you'll get a much smoother, flatter surface—perfect if you want to utilize a finish similar epoxy paint.
Originally Published: February 22, 2021
How to Repair Pitted Concrete Garage Floor
Posted by: hollomanimind1990.blogspot.com
0 Response to "How to Repair Pitted Concrete Garage Floor Updated"
Post a Comment